In this tutorial, you will install FusionAuth on Fly.io using the flyctl CLI. You will run FusionAuth locally and on Fly.io while accessing a Postgres database hosted on Fly.io.
What is Fly.io
Fly.io is a platform for deploying and running containerized applications. It offers a number of features that make it attractive to developers, including:
- The developer creates a Docker image for the web application.
- The developer pushes the Docker image to the Fly.io registry.
- The developer creates a Fly.io application and deploys the Docker image to it.
- Fly.io automatically launches the web application and makes it available to users over the internet.
Fly.io is a relatively new platform, but it is quickly gaining popularity among developers. It is a good choice for developers who are looking for a fast, reliable, and secure platform for deploying and running containerized applications.
One of the reasons to host on Fly.io is the competitive pricing, you should be able to run this entire tutorial for free (unless setting up an external IP). However, to sign up you will be required to enter a credit card for verification. Please remember to keep an eye on your resources though as anything can happen if you start having thousands of users hit that fancy new site of yours!
Prerequisites
To follow along with this tutorial, you need to have a Fly.io account, which you can sign up for here. You will also need to install the following command-line tools:
After installing flyctl make sure that you login to Fly.io by using the command below for the rest of this tutorial. I would recommend selecting a region closest to your users.
fly auth login
For the following examples, I will be using fusion-fly for the FusionAuth application and fusion-fly-db for the Postgres application running on Fly.io.
You can name your applications something similar but Fly.io uses global naming so I would suggest your namespace like mycoolapp-fusion-fly-*.
Create Postgres Database on Fly.io
The first thing to get started with is deploying a Postgres database on Fly.io.
fly postgres create
You will see something appear like the below information. It is VERY important that you save this information.
Postgres cluster fusion-fly-db created
  Username:    postgres
  Password:    vGrUf0wysPLwQFc
  Hostname:    fusion-fly-db.internal
  Flycast:     fdaa:3:578d:0:1::b
  Proxy port:  5432
  Postgres port:  5433
  Connection string: postgres://postgres:vGrUf0wysPLwQFc@fusion-fly-db.flycast:5432
This is not a managed database. If Postgres crashes because it ran out of memory or disk space, you’ll need to do a little work to get it back.
Connect a Local FusionAuth Instance to Fly.io Postgres Database
When it comes to connecting locally to the created Postgres database, there are two great options proxy or external IP
Proxy Fly.io to Local Connection
Below you will set up a proxy to Fly.io and connect to a local FusionAuth instance running in Docker.
First, establish the proxy connection using the below command.
fly proxy 5432 -a fusion-fly-db
The above command will hold the terminal session so you will need to open another session while this is running.
Create two files in a test directory .env and docker-compose.yml using the below command.
mkdir fusion-fly-test && cd fusion-fly-test
touch .env && touch docker-compose.yml
Update the .env file with the following information, note that host.docker.internal is used instead of localhost for docker, you may find this differs on your machine and you may need to use your IP address.
POSTGRES_URL=jdbc:postgresql://host.docker.internal:5432/postgres
POSTGRES_USER=postgres
POSTGRES_PASSWORD=vGrUf0wysPLwQFc
DATABASE_USERNAME=fusionauth
DATABASE_PASSWORD=hkaLBM3RVnyYeYeqE3WI1w2e4Avpy0Wd5O3s3
ES_JAVA_OPTS="-Xms512m -Xmx512m"
FUSIONAUTH_APP_MEMORY=512M
Update the docker-compose.yml file with the following information. Notice there is no Postgres database in this compose file because we are using the application on Fly.io.
version: '3'

services:
  search:
    image: docker.elastic.co/elasticsearch/elasticsearch:7.17.0
    environment:
      cluster.name: fusionauth
      bootstrap.memory_lock: "true"
      discovery.type: single-node
      ES_JAVA_OPTS: ${ES_JAVA_OPTS}
    healthcheck:
      test: [ "CMD", "curl",  "--fail" ,"--write-out", "'HTTP %{http_code}'", "--silent", "--output", "/dev/null", "http://localhost:9200/" ]
      interval: 5s
      timeout: 5s
      retries: 5
    networks:
      - search_net
    restart: unless-stopped
    ulimits:
      memlock:
        soft: -1
        hard: -1
    volumes:
      - search_data:/usr/share/elasticsearch/data

  fusionauth:
    image: fusionauth/fusionauth-app:latest
    depends_on:
      search:
        condition: service_healthy
    environment:
      DATABASE_URL: ${POSTGRES_URL}
      DATABASE_ROOT_USERNAME: ${POSTGRES_USER}
      DATABASE_ROOT_PASSWORD: ${POSTGRES_PASSWORD}
      DATABASE_USERNAME: ${DATABASE_USERNAME}
      DATABASE_PASSWORD: ${DATABASE_PASSWORD}
      FUSIONAUTH_APP_MEMORY: ${FUSIONAUTH_APP_MEMORY}
      FUSIONAUTH_APP_RUNTIME_MODE: development
      FUSIONAUTH_APP_URL: http://fusionauth:9011
      SEARCH_SERVERS: http://search:9200
      SEARCH_TYPE: elasticsearch

    networks:
      - search_net
    restart: unless-stopped
    ports:
      - 9011:9011
    volumes:
      - fusionauth_config:/usr/local/fusionauth/config

networks:
  search_net:
    driver: bridge

volumes:
  fusionauth_config:
  search_data:
Start FusionAuth using the docker compose.
docker compose up
External Fly.io to Local Connection
If you are having any issues find more details about Fly.io Postgres External Connections.
To connect across the internet and not just within Fly.io you must allocate an external IP v4.
Enter the below command and you will see a message ? Looks like you're accessing a paid feature. Dedicated IPv4 addresses now cost $2/mo. Are you ok with this? (y/N) y, answer yes to create the new IP address.
fly ips allocate-v4 --app fusion-fly-db
Once the external IP address has been allocated you can now connect from your local FusionAuth instance to Fly.io’s Postgres database.
Update the .env file taking note of the new POSTGRES_URL fusion-fly-db.fly.dev.
POSTGRES_URL=jdbc:postgresql://fusion-fly-db.fly.dev:5432/postgres
POSTGRES_USER=postgres
POSTGRES_PASSWORD=vGrUf0wysPLwQFc
DATABASE_USERNAME=fusionauth
DATABASE_PASSWORD=hkaLBM3RVnyYeYeqE3WI1w2e4Avpy0Wd5O3s3
ES_JAVA_OPTS="-Xms512m -Xmx512m"
FUSIONAUTH_APP_MEMORY=512M
Connecting Fly.io FusionAuth Application
Now that you have seen how to test FusionAuth locally, it is time to try using it on Fly.io.
Fly.io does not currently support using docker compose so you will need to create a Dockerfile using the below command.
touch Dockerfile
Update Dockerfile with the below information.
# Docker file content
FROM  fusionauth/fusionauth-app:latest as build
FROM debian:buster-slim
RUN apt-get update && apt-get install -y \
    curl \
    ca-certificates \
    --no-install-recommends
# copy FusionAuth from other image.
COPY  --from=build /usr/local/fusionauth /usr/local/fusionauth
#Addd Env
ENV FUSIONAUTH_APP_URL="http://0.0.0.0:9011"
CMD ["/usr/local/fusionauth/fusionauth-app/bin/start.sh"]
Using Fly.io’s command line tool you can now launch the FusionAuth application using the above Dockerfile. This will run the FusionAuth instance on port 9011
fly launch
You will see the following when you launch, this is where you will include your application name like fusion-fly. If you see anything about a Postgres or Redis database you can answer No.
Scanning source code
Detected a Dockerfile app
? Choose an app name (leave blank to generate one):
Then select the region you would like this deployed in, for example Denver, Colorado (US) (den). Pick one that is closest to your users or just you for testing.
You will then see the message Would you like to set up a Postgresql database now? (y/N)
If you followed the steps above answer no, if not answer yes and see the steps from above.
This will create a fly.toml file for the app in the current directory that has the information in it like below.
app = "fusion-fly"
primary_region = "den"

[build]

[http_service]
  internal_port = 8080
  force_https = true
  auto_stop_machines = true
  auto_start_machines = true
  min_machines_running = 0
  processes = ["app"]
Update fly.toml to look like the below TOML so that an instance will stay running and the internal port 9011 will be used.
Please note that this has fusion-fly you will need to make sure that you use your app name. The internal_port will need to have 9011 as this is what port is setup for FusionAuth and you will be exposing it to the internet.
app = "fusion-fly"
primary_region = "den"

[build]

[http_service]
  internal_port = 9011
  force_https = true
  auto_stop_machines = true
  auto_start_machines = true
  min_machines_running = 1
  processes = ["app"]
Now you can redeploy the application using the below command.
fly deploy
You should now see a message like Visit your newly deployed app at https://fusion-fly.fly.dev/, this will be the URL you can visit your FusionAuth application at but you will need to update some things from below first.
Set env Variables
For the application that you just deployed to correctly connect to the Postgres application, you will need to add some secrets to it using the below command.
Please note that this has fusion-fly-db you will need to make sure that you use your app name and values for secrets below to match your Postgres database.
flyctl secrets set DATABASE_URL=jdbc:postgresql://fusion-fly-db.internal:5432/postgres POSTGRES_USER=postgres POSTGRES_PASSWORD=vGrUf0wysPLwQFc DATABASE_USERNAME=fusionauth DATABASE_PASSWORD=hkaLBM3RVnyYeYeqE3WI1w2e4Avpy0Wd5O3s3
If you would like to validate that this occurred you can run the below command.
fly config env
Which will output the secret names, but not the values. You know because they are secret 😉.
Secrets
NAME                    DIGEST                  CREATED AT
DATABASE_PASSWORD       9d1dc0afc6e529eb        2023-10-23T17:45:47
DATABASE_URL            227bfd98ba2dc927        2023-10-23T17:37:21
DATABASE_USERNAME       d73e072b5461bac1        2023-10-23T17:45:47
POSTGRES_PASSWORD       d1f0c1a3df91a4bb        2023-10-23T17:45:47
POSTGRES_USER           8a66529be806f1bd        2023-10-23T17:45:47

Environment Variables
NAME    VALUE
Scale FusionAuth Instance
FusionAuth also needs to be scaled up to run correctly. You can scale the application’s machines by running the below command.
fly scale vm shared-cpu-2x
You should see a message that says
Scaled VM Type to 'shared-cpu-2x'
      CPU Cores: 2
         Memory: 512 MB
Accessing your FusionAuth Instance
Now your FusionAuth application should be up and running at your website like https://fusion-fly.fly.dev/.
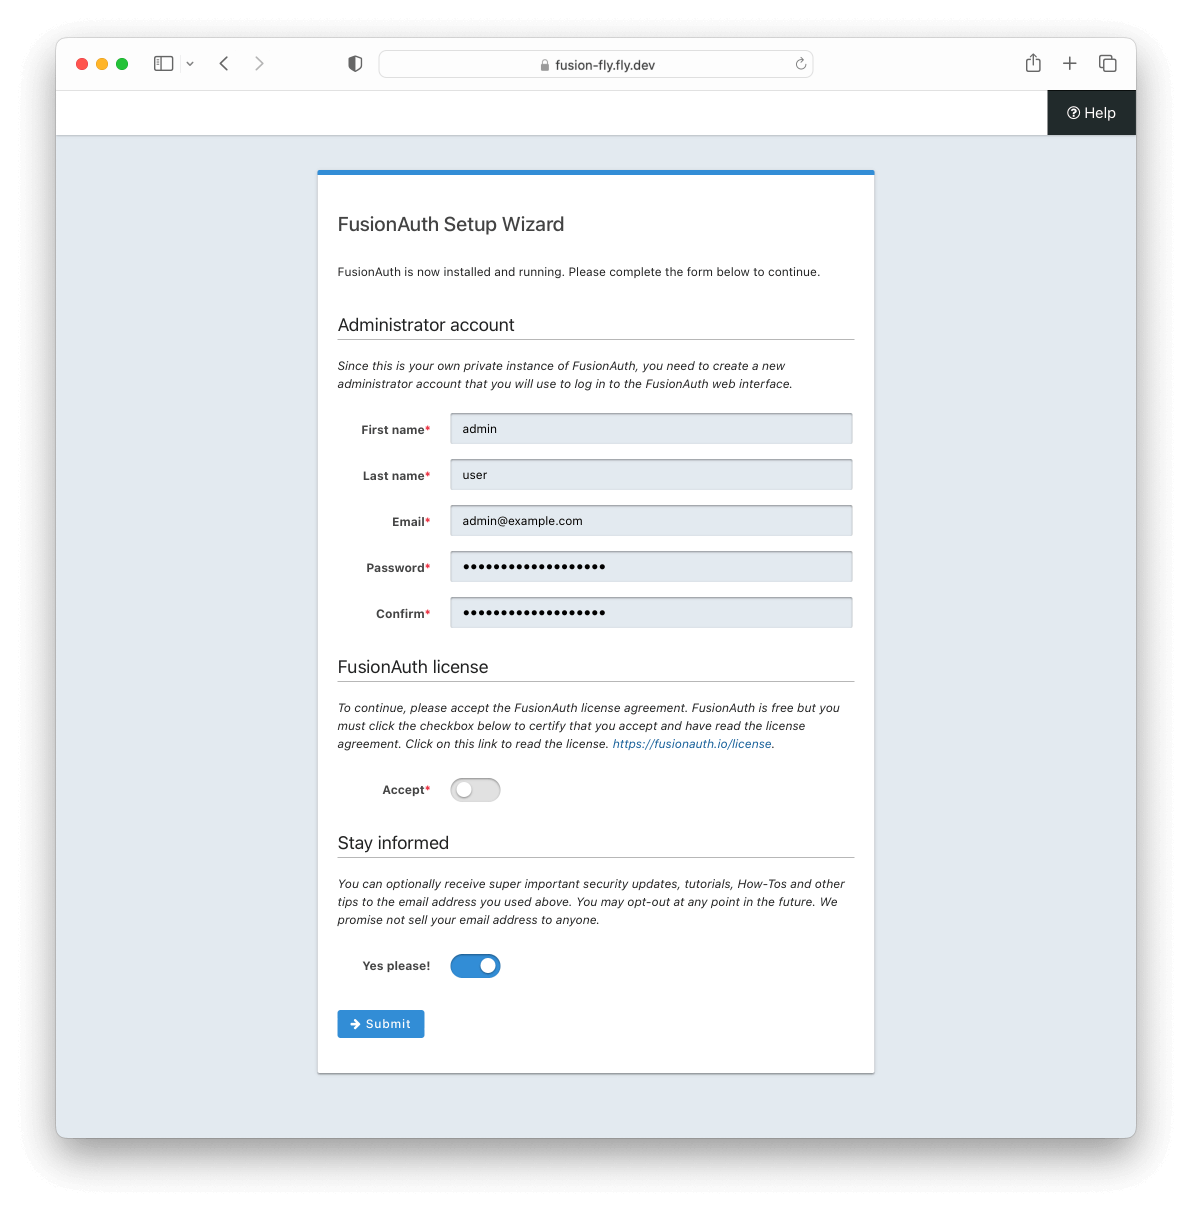
You will see a FusionAuth Setup Wizard screen where you can add an Administrator account, remember this email and password as you will need it to access the application.
Cleanup and extras
Cleanup IPv4 on Postgres Instance
I would recommend removing the IPv4 that you are paying $2 a month by running the below command.
fly ip release <your-v4-ip> -a <your-app>
Example
fly ip release 168.220.84.39 -a fusion-fly-db
Logs
Checking logs at any point in the process.
fly logs -a fusion-fly
