Security
Integrating Third-Party Services for Improved Identity Management
By Subha Chanda and Jura Gorohovsky
Whether you’re building a complex SaaS application or an e-commerce platform, handling authentication with a complete prebuilt authentication system like FusionAuth means you can focus on your product’s core functionality and be assured that you and your users are protected by a robust auth solution.
FusionAuth can authenticate users on its own, but in some cases, you might want to integrate with third-party services and identity providers to enhance this functionality. The following are three major reasons you’d want to do so:
You want to use third-party identity providers in your application. Depending on your business, you could use a popular social identity provider like Facebook or go with something more industry-specific, like GitHub.
You want to implement SSO in an internal environment using a third-party identity provider.
You need to implement SMS as a second factor using Twilio or a different SMS provider.
Let’s consider these scenarios in more detail and see how you can enhance FusionAuth with these services.
Using Popular Third-Party Identity Providers to Build Trust and Streamline Onboarding
If you work for a web business that’s not yet made a name for itself, new visitors might be reluctant to give you their credentials. They don’t know how well you will secure them or if you have bad intentions with this information.
Even if new clients tend to trust you, password fatigue is real. The need to create yet another username-password pair can prevent them from registering with your application or cause them to follow the easy but dangerous path of reusing credentials.
Using well-known and trusted identity providers like Google or Facebook means your visitors are more likely to sign up for your application because it’s easy to do and they don’t need to entrust you with their passwords.
This also provides a huge benefit when it comes to customer onboarding. For example, you might like to personalize the customer experience, but someone who quickly signed up to see what your site is all about might not want to go through the process of filling in their name, creating an avatar, and so on. You can remove this entry barrier by getting this information directly from a social identity provider like Facebook or LinkedIn, thus improving the client experience.
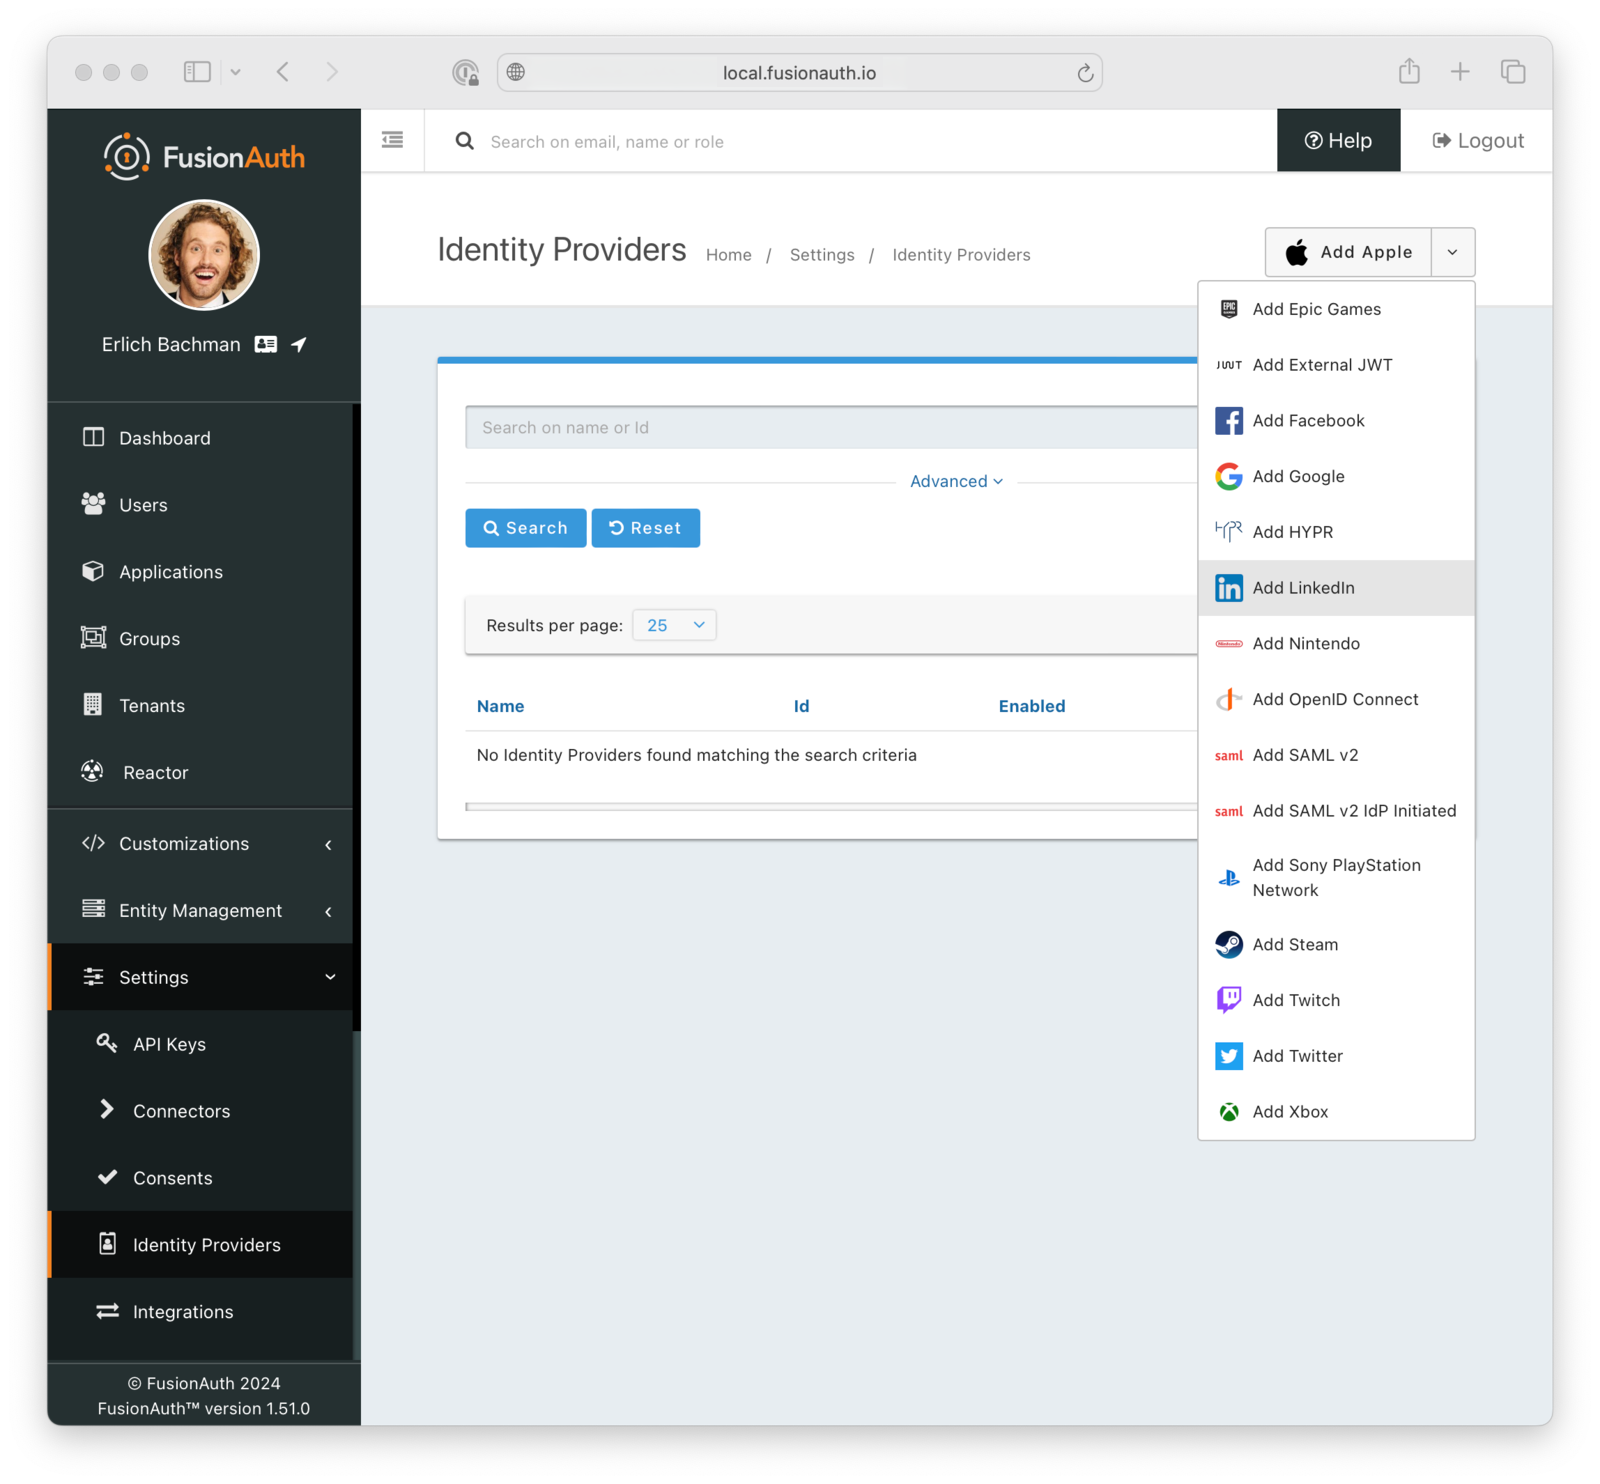
FusionAuth provides quick templates to configure many identity providers, and you can enable them for your web application with a few clicks. These include the following:
Google and Apple
Major social identity providers such as Facebook, X (formerly Twitter), and LinkedIn
Identity providers commonly used in the gaming industry, such as Epic Games, Nintendo, Sony, Steam, Twitch, and Xbox
For example, if you want to let your users log in with their LinkedIn account, this is how you can do it: create a LinkedIn app, set permissions, choose to Add LinkedIn inside FusionAuth’s identity provider settings, copy over the client credentials from the LinkedIn app, save, and you’re done.
Using Industry-Specific Identity Providers with a Generic OpenID Connect Template
What if an identity provider is not supported with a FusionAuth configuration template? You can still plug it in using a generic OpenID Connect or SAML integration.
Let’s say your application is targeted at professional software developers, and you want to provide login options that they’re accustomed to using, such as Microsoft, GitHub, or GitLab accounts.
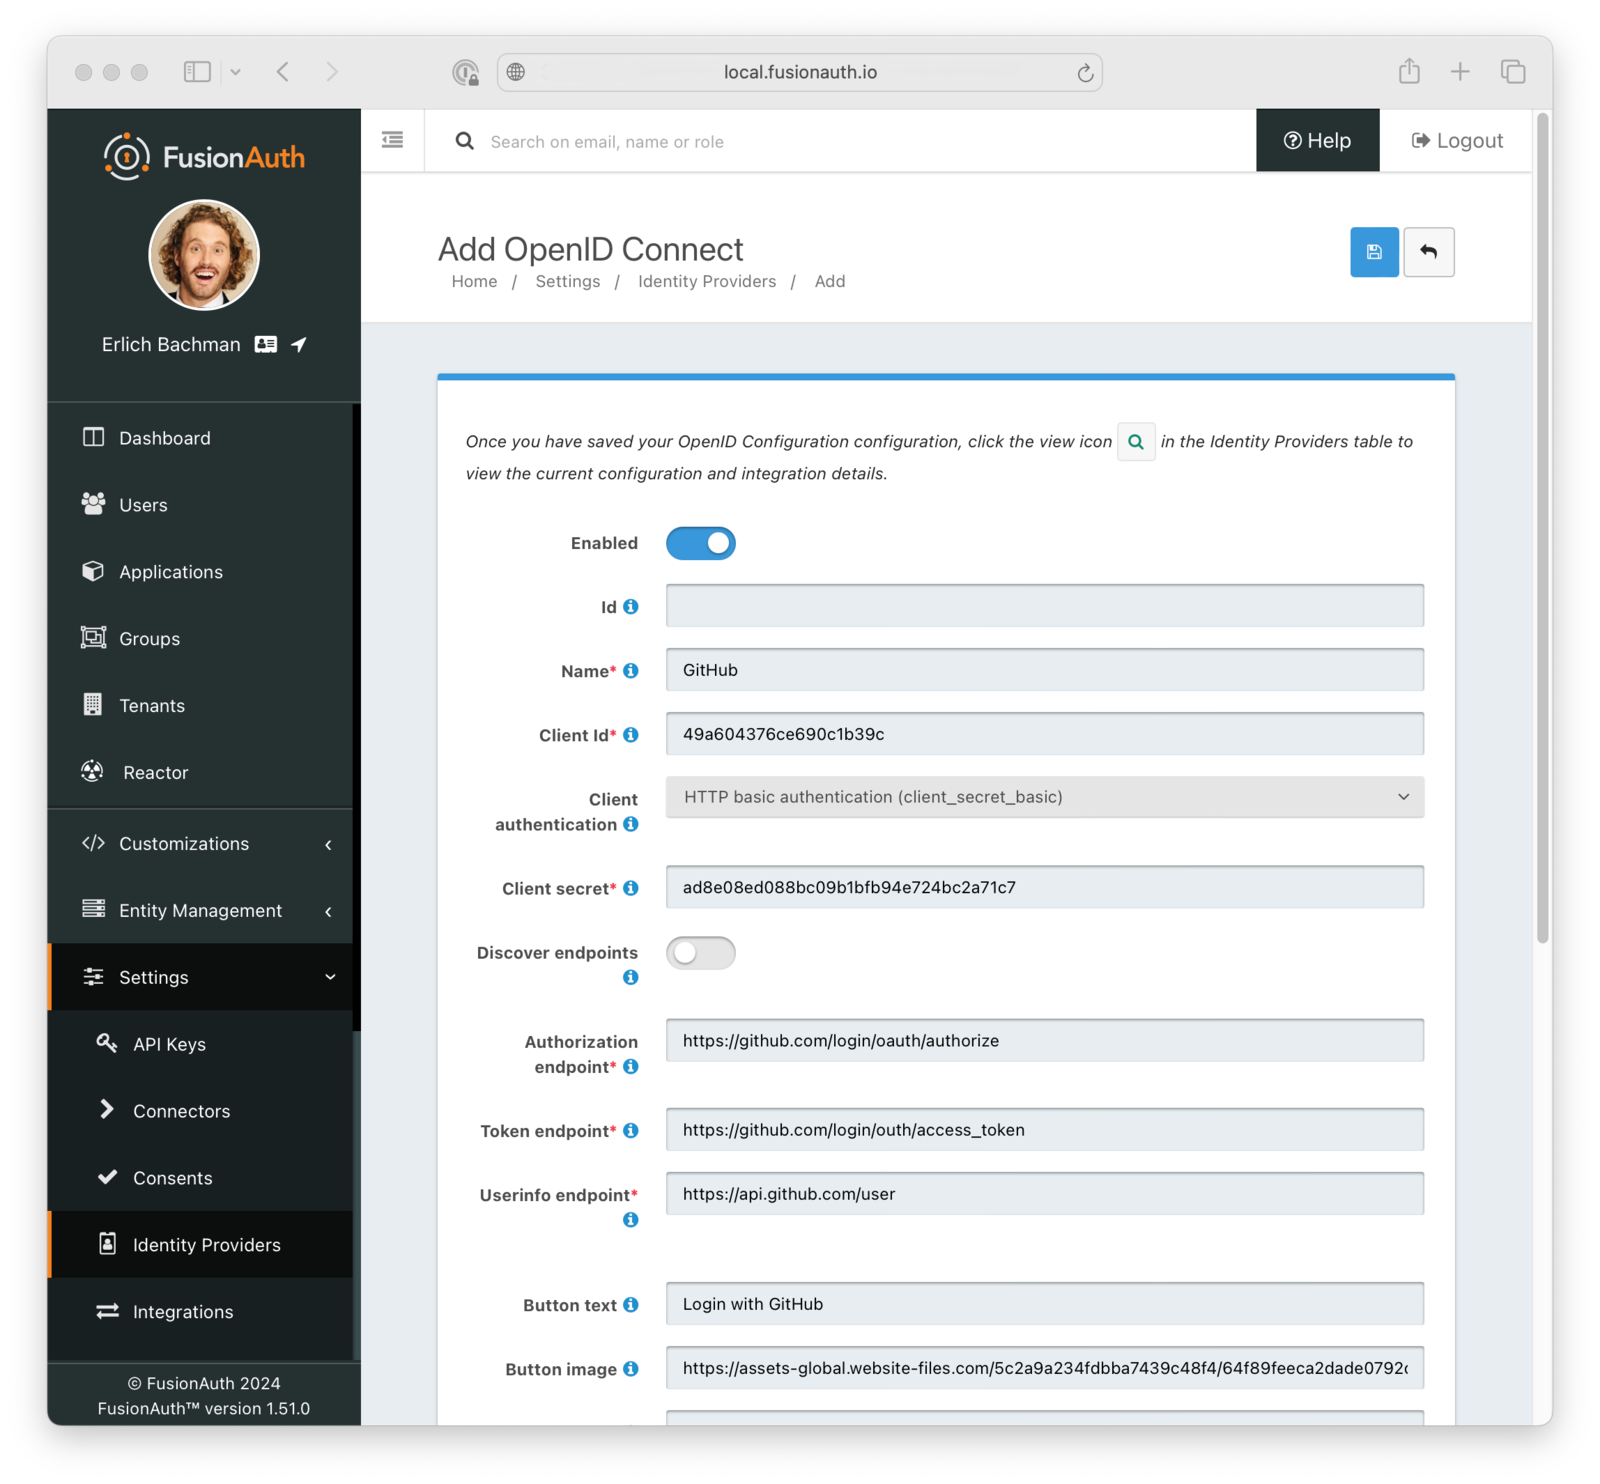
Let’s take GitHub, for example. Here’s how you can configure social login via GitHub using FusionAuth’s generic OpenID Connect provider. The workflow includes creating a new OAuth2 application in your GitHub profile, creating a new OpenID Connect identity provider in FusionAuth, and filling out the provider options.
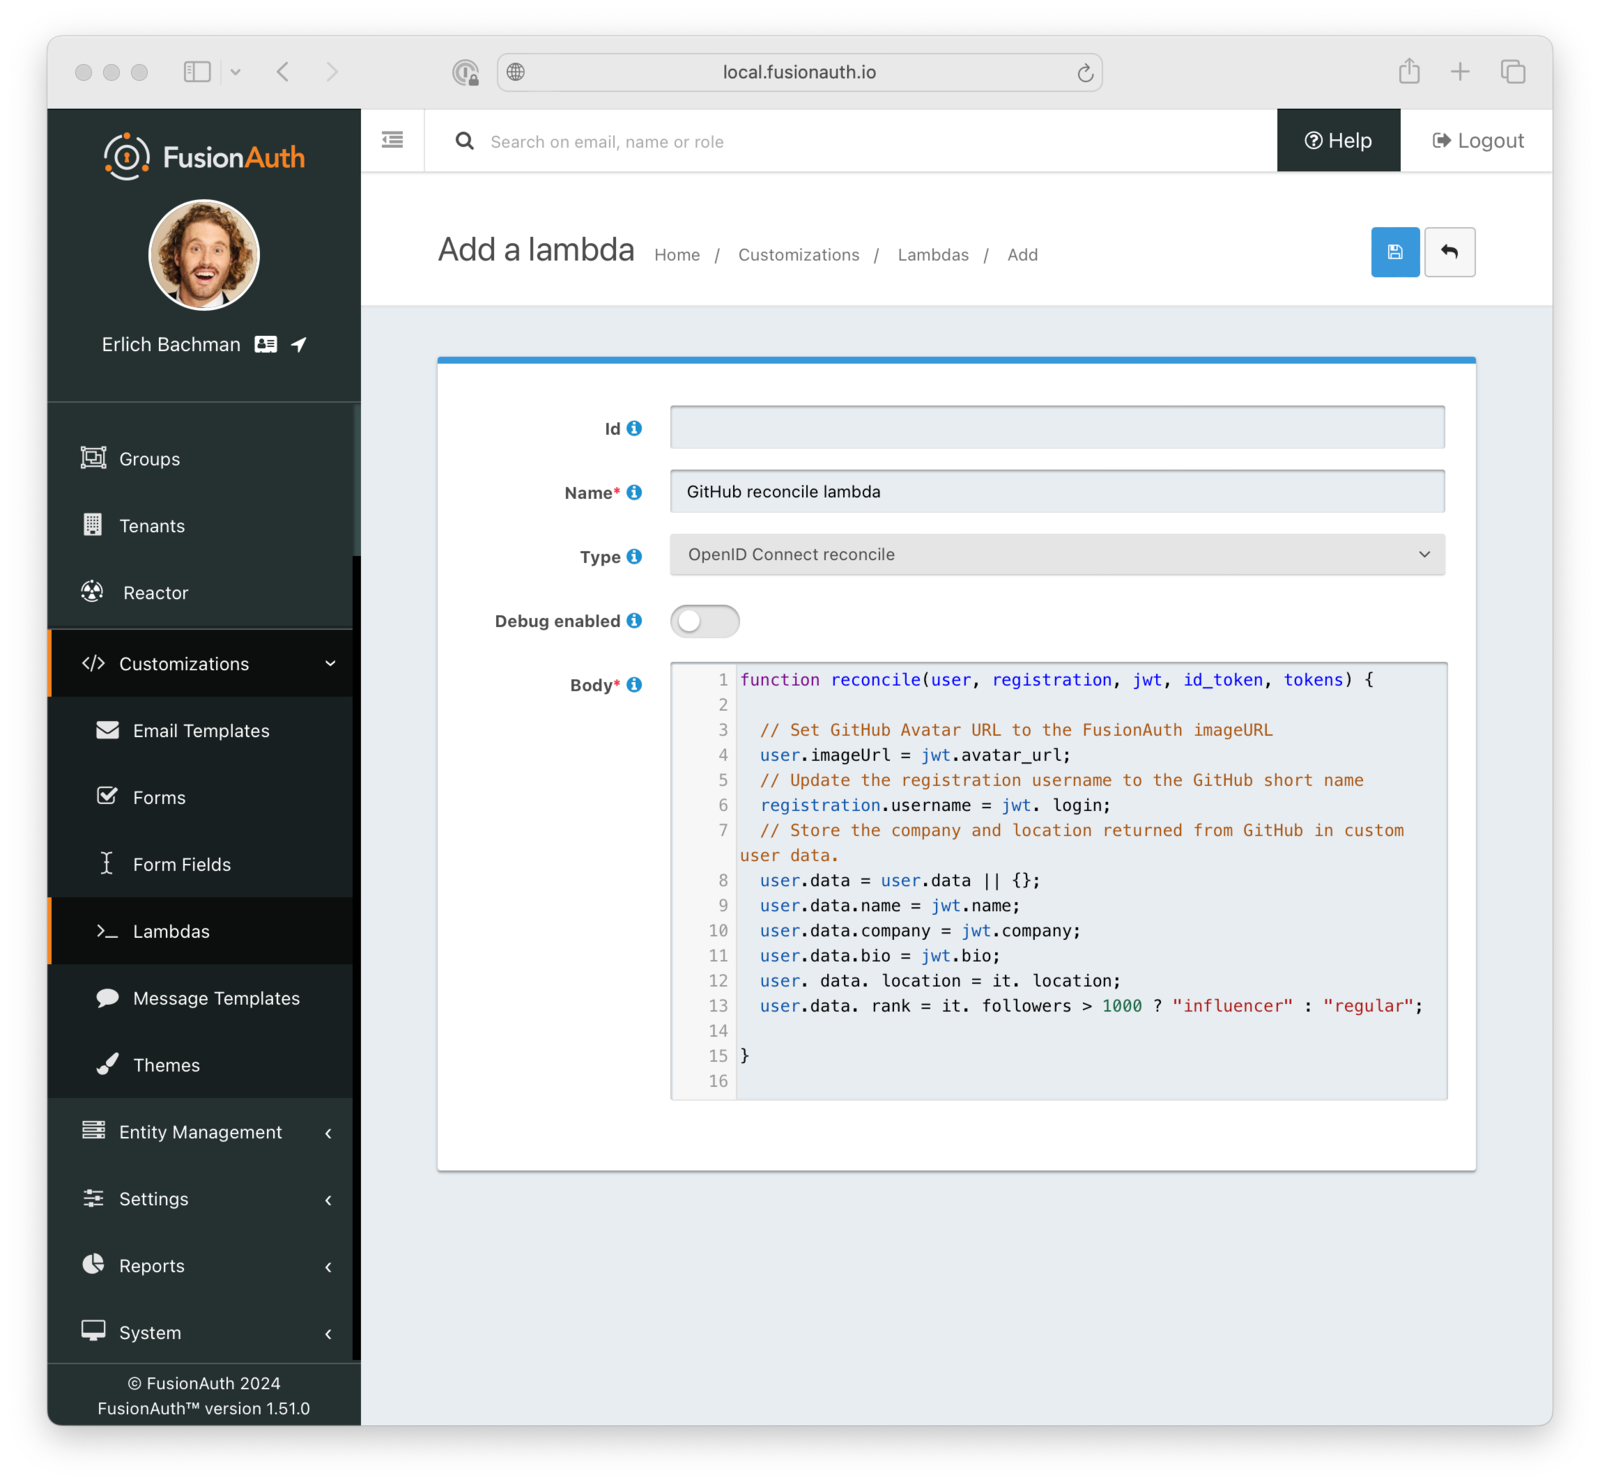
Optionally, since GitHub’s OpenID Connect implementation is not strictly to spec, you may want to create a custom reconcile lambda function that will enable FusionAuth to get more information about the logged-in user than GitHub normally provides.
For example, the following JavaScript lambda function reads the JWT token returned by GitHub and extends FusionAuth’s user entry with the name, company, biography, and location defined in the GitHub user profile. It also checks if the GitHub user has over one thousand followers, and if so, it assigns a special “influencer” rank to the FusionAuth user.
function reconcile(user, registration, jwt, id_token, tokens) {
 registration.username = jwt.login;
 user.imageUrl = jwt.avatar_url;
 user.data = user.data || {};
 user.data.name = jwt.name;
 user.data.company = jwt.company;
 user.data.bio = jwt.bio;
 user.data.location = jwt.location;
 user.data.rank = jwt.followers > 1000 ? "influencer" : "regular";
}
Here’s what the FusionAuth UI for adding lambda functions looks like:
Enabling Single Sign-On in an Organization
Another reason to connect to a third-party identity provider is to prevent your users in an organization from having to log in multiple times for all the different tools they’re using. If you’re already using platforms such as Amazon Cognito or Azure Active Directory to manage your internal users, integrating FusionAuth with these platforms allows your users to continue using their existing credentials as part of a single sign-on (SSO) configuration. It’s also easier to manage their permissions if they move around in different roles in the company or to offboard them.
If your application serves external users as well, you can pick a different set of public identity providers for their convenience.
You can plug in both Amazon Cognito and Azure Active Directory to FusionAuth as OpenID Connect providers using the same generic OpenID Connect workflow shown in the GitHub section above.
Implementing SMS-Based Multifactor Authentication
FusionAuth takes care of all things auth so you don’t have to. Similarly to how you delegate authentication and authorization to FusionAuth, FusionAuth delegates dealing with SMS infrastructure all across the globe to a specialized partner, Twilio.
When you’re using FusionAuth for multifactor authentication via SMS, integrating with a delivery partner removes the complexity of having to worry about how to get an SMS to that new employee who just joined from a country you never knew existed.
Using Twilio
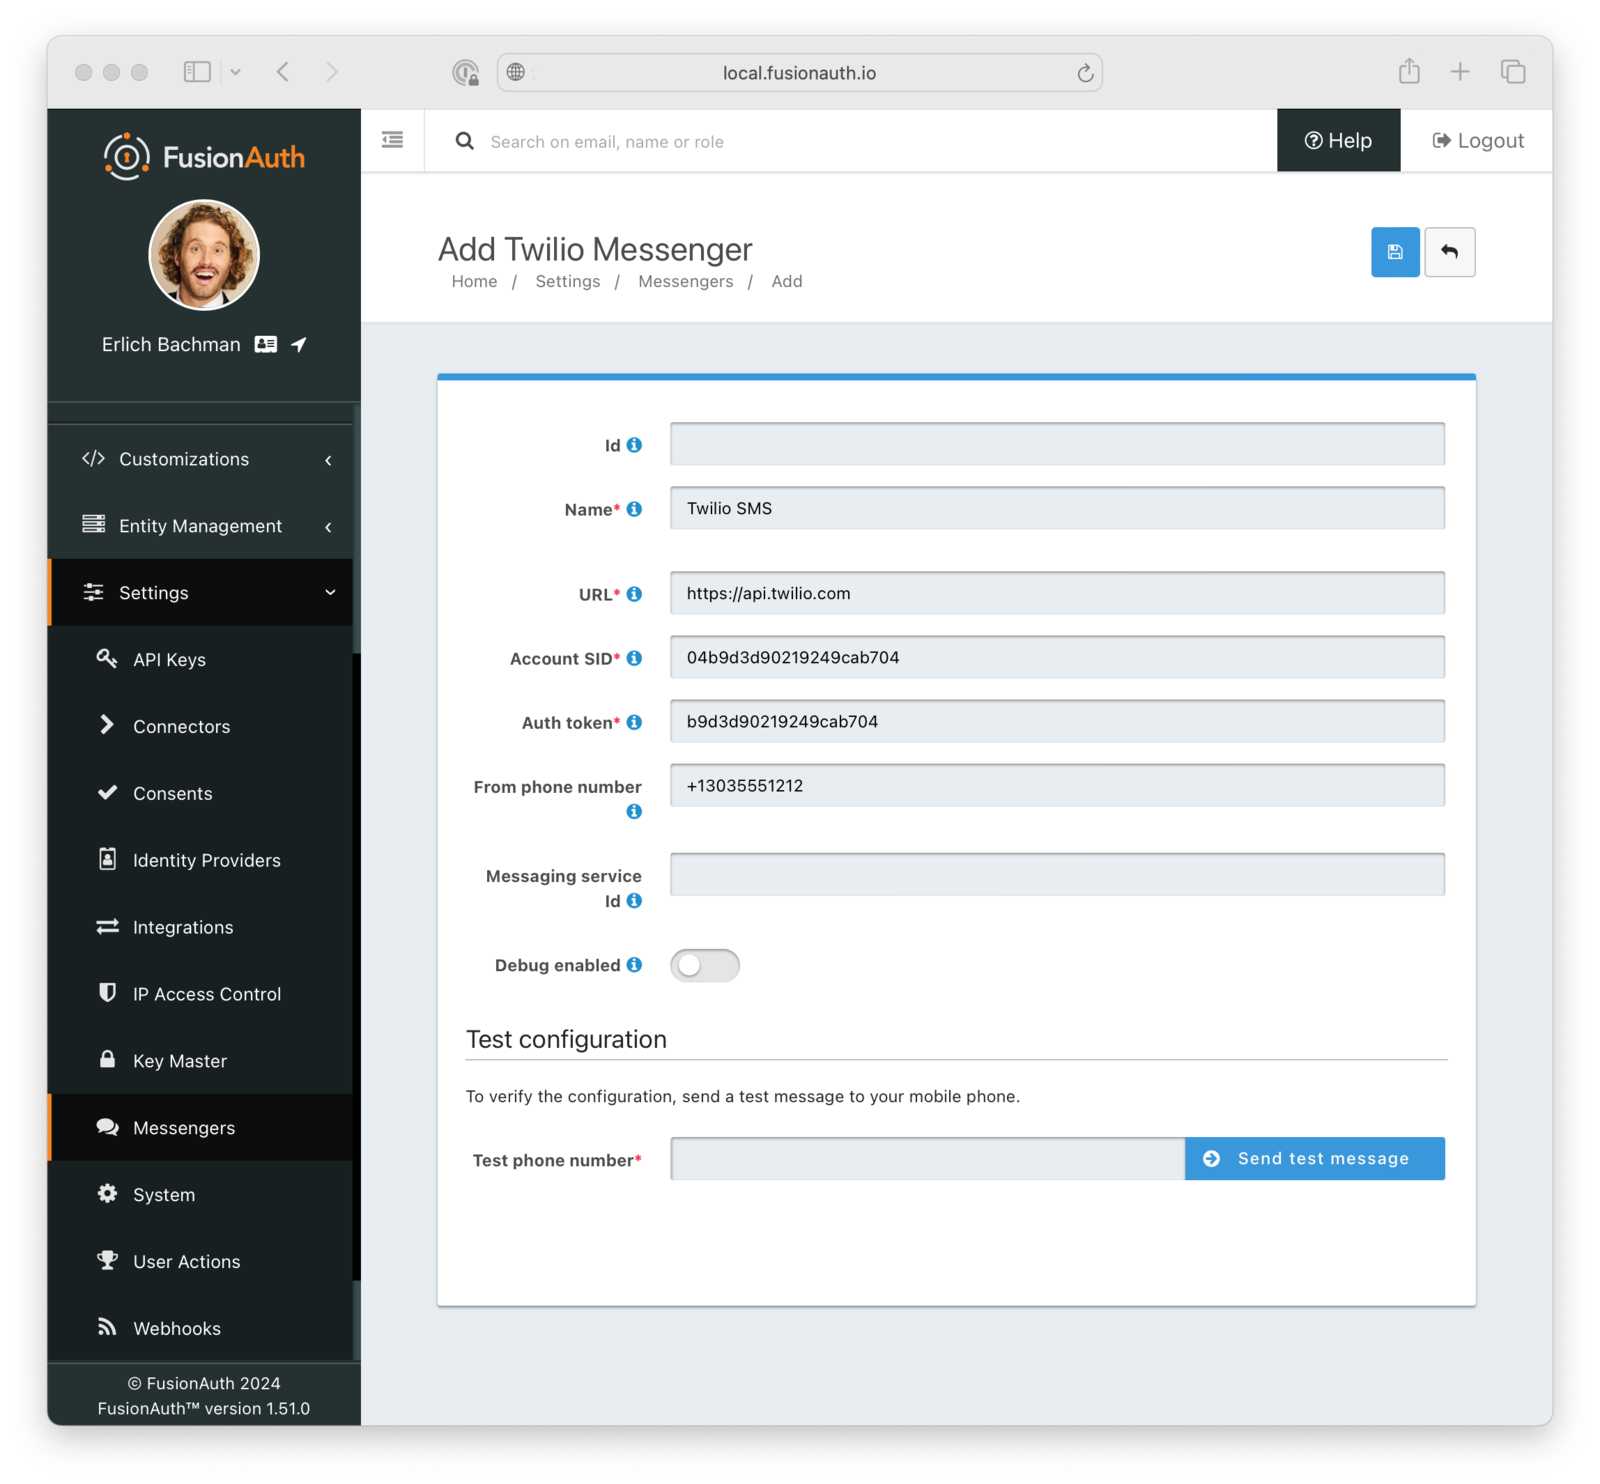
If you want to use Twilio for SMS-based MFA, you need to create a Twilio messenger configuration that links FusionAuth to your Twilio account.
Copy the account SID and auth token from your Twilio account, buy a Twilio phone number that will be used to send SMS, and copy it into the From phone number field. Once this basic configuration is done, you can tell FusionAuth to send a test message from your Twilio phone number to your own number to verify that the configuration is working.
Using a Different SMS Provider
In some cases, you may want to go with a different SMS provider.
You might want to start enforcing MFA and a large part of your customer base is located in countries where you’re not happy with the rates that Twilio offers. Alternatively, you may need a faster turnaround on 10DLC regulatory approvals in the US, and you found a provider that’s known to get you through the approval process in days instead of months. Finally, your company may be heavily invested in a certain technology stack---for example, if AWS is your stack of choice, you would consider using the Amazon Simple Notification Service (SNS) for SMS-based MFA.
Whatever the reason, FusionAuth enables this by supporting generic messengers. Generic messengers are helpful if you want to configure a different SMS provider or if you want to use a different transport for your messages, such as WhatsApp or push notifications.
Let’s say your SMS provider of choice is Infobip. You need to do the following to use it with FusionAuth to send one-time MFA codes:
1. Create an endpoint in a web application you control that will receive JSON messages from FusionAuth and relay them to Infobip. In FusionAuth terms, this endpoint is called the generic message receiver. The receiver will need to get JSON messages from FusionAuth and use the data contained within---destination phone numbers and one-time codes---to call an Infobip endpoint that triggers sending SMS messages.
2. Create a new generic messenger configuration in FusionAuth and specify the URL of your generic message receiver that FusionAuth will send JSON messages to.
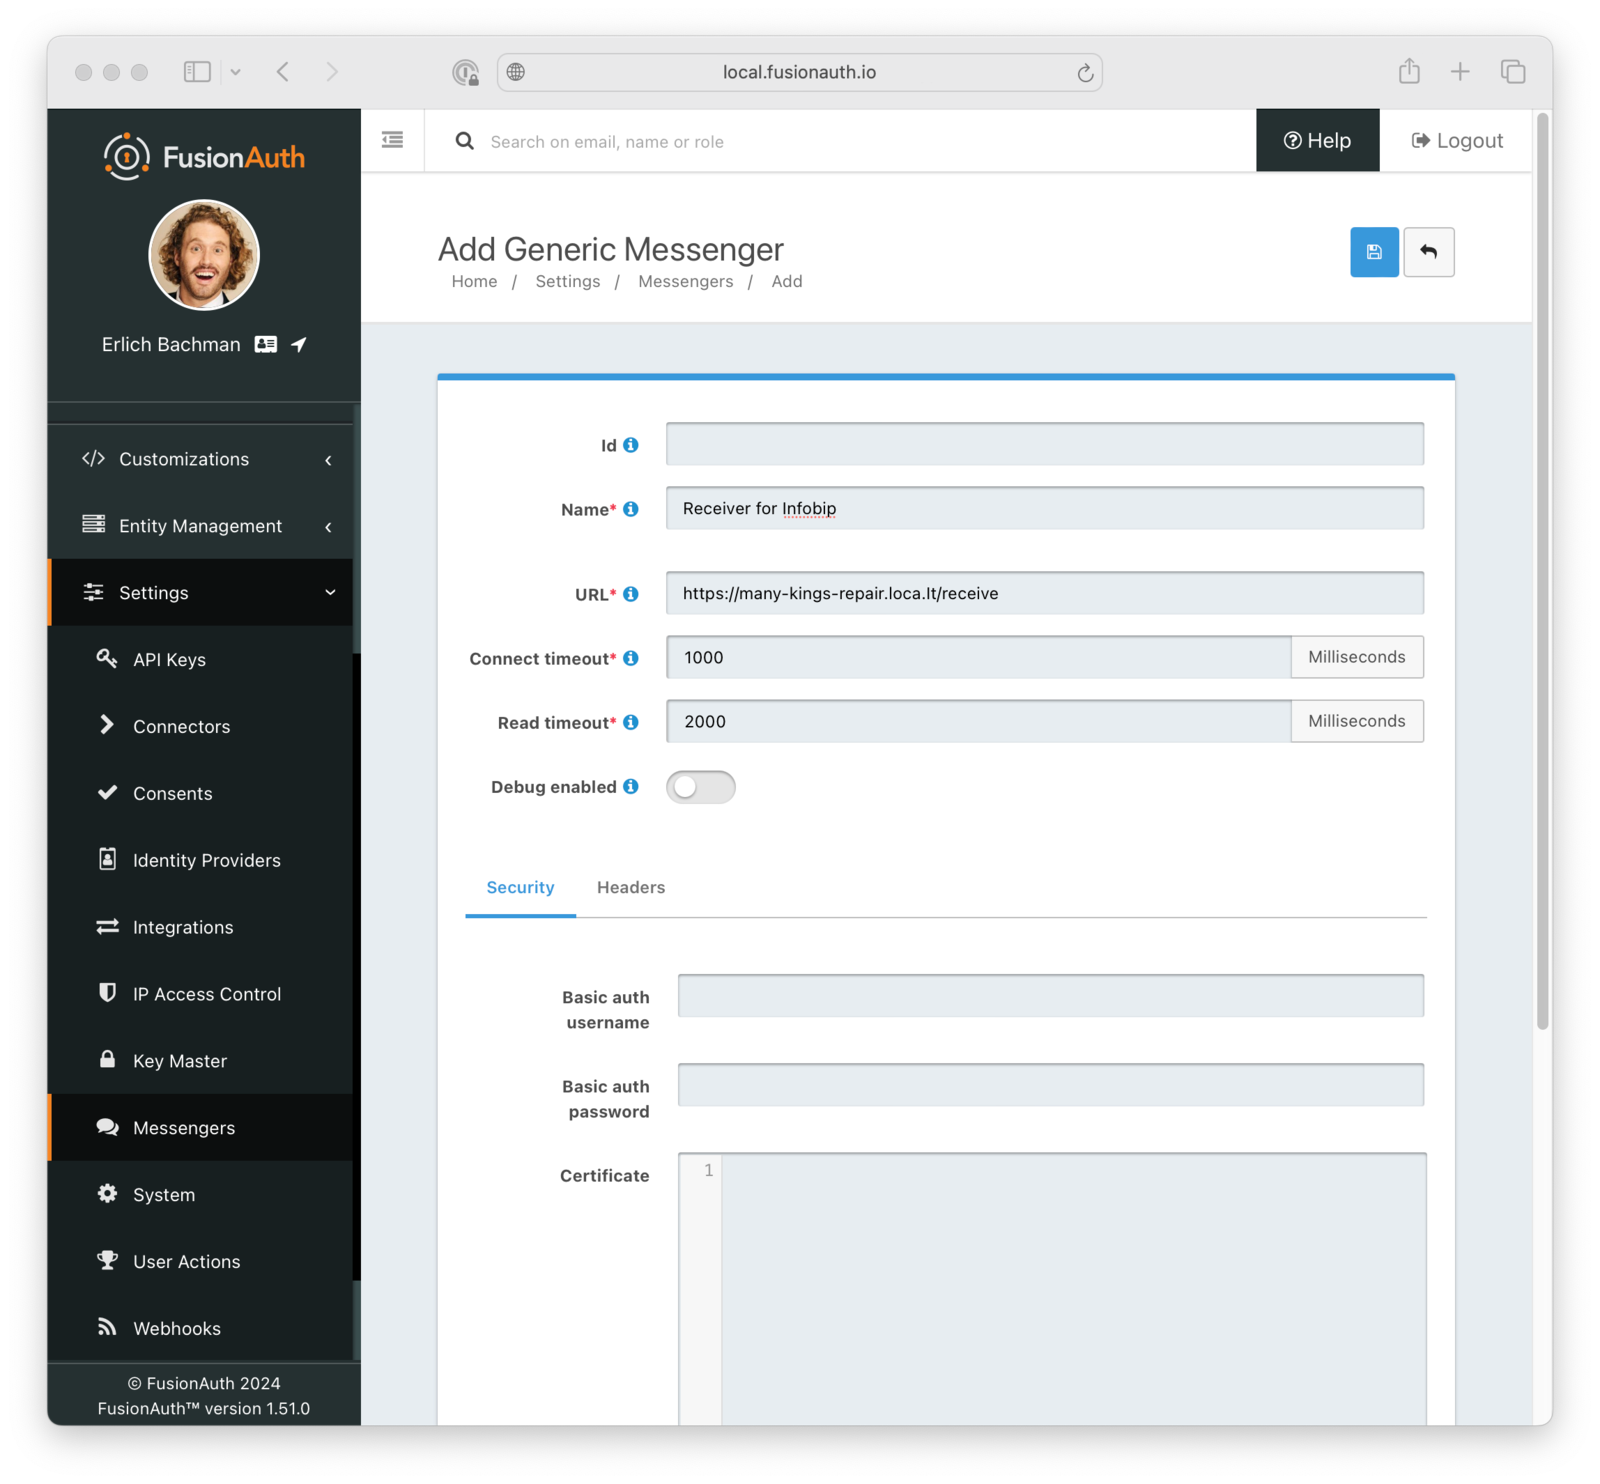
For example, in a test Express app, your receiver endpoint may look like this:
app.post('/receive', (req, res) => {
  const {
    phoneNumber,
    textMessage
  } = req.body;
  const infobipSmsUrl = 'https://yourbaseurl.api.infobip.com/sms/2/text/advanced';
  const requestOptions = {
    method: 'POST',
    headers: {
      'Authorization': 'App YOUR_INFOBIP_API_KEY',
      'Content-Type': 'application/json',
      'Accept': 'application/json'
    },
    body: JSON.stringify({
      "messages": [{
        "destinations": [{
          "to": `${phoneNumber}`
        }],
        "from": "FusionAuth",
        "text": `Your one-time code is "${textMessage}"`
      }]
    })
  };
  fetch(infobipSmsUrl, requestOptions)
    .then(res => res.json())
    .then(json => {
      console.log(json);
      res.status(200).json({
        message: "Message delivered to Infobip!"
      })
    })
    .catch(err => {
      console.error('error:' + err);
      res.status(502).json({
        message: `Message not delivered to Infobip due to error: ${err}`
      })
    });
})
When it receives a JSON message from FusionAuth, this Express endpoint unwraps relevant data---phoneNumber and textMessage---from the body of the request and uses the node-fetch library to send the data over to an Infobip SMS endpoint in a format that Infobip requires.
When you click Test generic configuration in your generic messenger settings, FusionAuth sends the dummy phone number (555)555-5555 and the dummy message Testing. For testing purposes, use a phone number that can actually receive SMS in the destinations property. In a production configuration, you would want to pass the real FusionAuth user’s phone number to the destinations property in the body of your outgoing POST request to Infobip.
This example uses Infobip, but when you use generic message providers, you can relay messages with user phone numbers and one-time codes from FusionAuth to any SMS provider. In fact, if you want your provider to send one-time codes as WhatsApp messages or make phone calls, you can do that too.
Summary
FusionAuth provides extensibility points that let you use third-party identity providers and communication services to tailor your authentication experience to your application’s use cases.
Whether you’re a startup looking to get more credibility with social identity providers, a niche SaaS, or an enterprise with applications that serve internal and external users, FusionAuth has what it takes to flex your auth the way that works for you.